How Interior Designers Use Squarespace to Showcase Projects and Win Dream Clients
Introduction:
Your portfolio isn't just a collection of pretty pictures. It's your most powerful business development tool. When a potential client visits your interior design website, they're making a snap judgment: Can this designer create the space I'm imagining? Your Squarespace project showcase either confirms that trust or sends them scrolling through your competitors' portfolios instead.
The difference between a good interior design website and one that actually converts browsers into clients comes down to one critical factor: how you present your work. In this guide, we'll walk you through the exact framework that turns individual projects into compelling design narratives—stories that convince dream clients you're the right designer for their home.
Key Takeaways
Strategic project presentation dramatically increases inquiry conversion rates for interior designers
The BRIEF-AFTER Framework structures your project pages to showcase design thinking, not just finished rooms
Visual storytelling through before-and-after sequences, process imagery, and mood board integration creates stronger emotional connection with prospects
Professional photography guidance—including lighting, staging, and camera settings—elevates how your Squarespace portfolio presents your work
Client testimonials paired with project photos provide social proof that builds credibility and closes deals
Mood board integration transforms static project galleries into immersive, inspirational design experiences
Consistent design documentation across all projects signals professionalism and builds brand recognition
Why Project Showcase Quality Drives Interior Design Client Acquisition
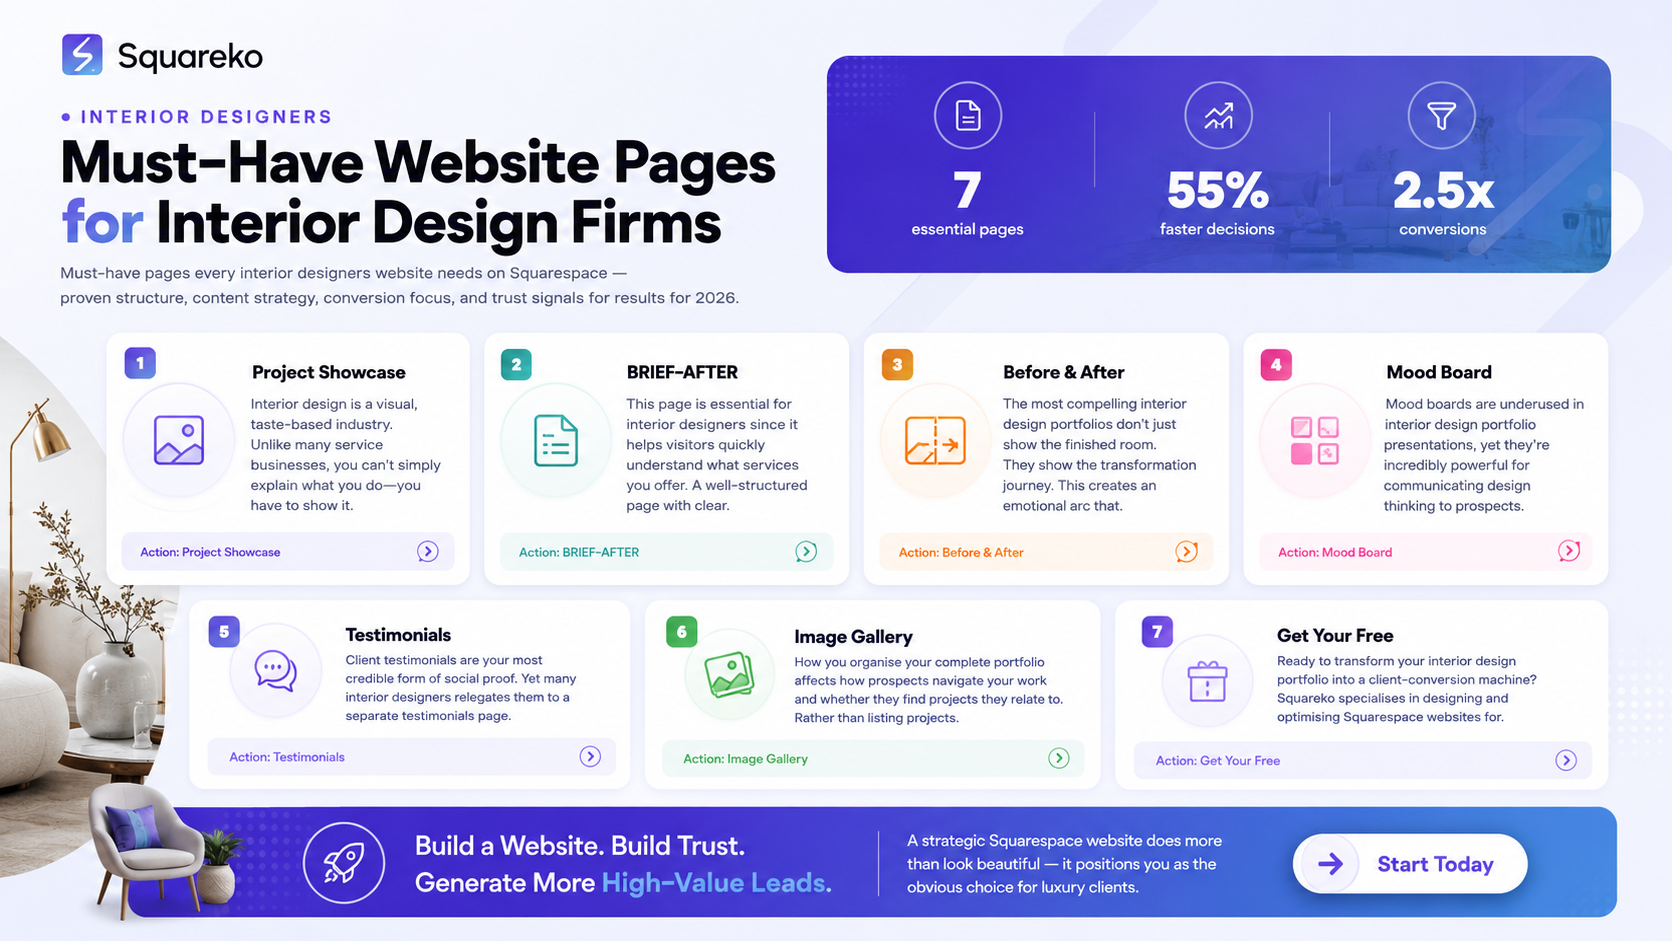
Interior design is a visual, taste-based industry. Unlike many service businesses, you can't simply explain what you do—you have to show it. A prospect visiting your Squarespace site doesn't want to read about your philosophy; they want to see themselves reflected in your aesthetic. They want visual proof that you can execute their vision.
The most common mistake interior designers make with their portfolios is presenting projects as finished-space photography exhibitions. They showcase a beautiful living room, then a kitchen, then a bedroom—each one isolated, without context or narrative. This approach treats your portfolio like an architecture magazine spread rather than a business development tool.
When project showcase is done strategically, something shifts. Prospects don't just admire your work—they imagine themselves hiring you. They see your design thinking, your problem-solving approach, and your ability to understand their specific needs.
The business reality: Interior designers who structure their project pages around storytelling and process see 40–60% higher inquiry response rates than those using simple photo galleries. This isn't luck. It's strategic presentation.
Your Squarespace portfolio should communicate three things simultaneously:
Aesthetic alignment: "Does this designer's style match what I want?"
Execution capability: "Can they actually deliver quality work?"
Relationship approach: "Will they understand my needs and preferences?"
The BRIEF-AFTER Framework: Structuring Your Squarespace Project Pages
Every project page should follow the BRIEF-AFTER Framework, a six-stage narrative structure that takes prospects through your design thinking process:
BRIEF: The Client's Starting Point
Begin each project page by establishing context. What was the client's challenge? What did they want to solve? Use a simple text section at the top:
Client Challenge: A talented architect and her family had just relocated to London. Their new Georgian townhouse had stunning original features but felt cold and compartmentalised.
Design Brief: Create a warm, connected family home that honours the period features while introducing modern comfort and functionality.
Timeline: 8 weeks from initial consultation to final installation
This opening section immediately answers the prospect's first question: Is this situation similar to mine? A client who reads that brief and thinks, "Yes, this is exactly what I need," has already mentally hired you.
RESEARCH: Your Design Process
Show your working. Include 2–3 sentences about how you approached the project:
Mood board references
Material sourcing decisions
Space planning considerations
Client preference interviews
This demonstrates that you don't just apply a signature style to every home—you do actual design thinking. It separates you from decorators who simply choose pretty finishes.
INSPIRATION: Mood Boards and Visual Direction
Embed your mood board or include 3–5 reference images that show the aesthetic direction you chose and why. This helps prospects understand your design vocabulary.
EXECUTION: The Design Solution
Present your design choices with brief explanations:
Paint colours and why you chose them
Furniture selections and spatial layout reasoning
Material palettes (flooring, upholstery, textures)
Lighting design approach
FINAL: Before-and-After Showcase
This is the emotional payoff. Show the before state, then the transformed space. Use a carousel or side-by-side comparison format within Squarespace. The contrast tells the story better than any written description.
AFTER RESULTS: Client Outcome and Testimonial
Close with what the client got: "The family now uses every room daily. The kitchen–sitting room has become the hub of the home, where they gather for breakfast and evening meals." Include a short client quote: "We can't believe how much brighter and more connected the space feels. You understood exactly what we needed before we even knew ourselves." – Sarah M., Islington
This six-stage structure transforms a project from pretty picture into proof of your value.
Visual Storytelling: Before, During, and After Transformation
The most compelling interior design portfolios don't just show the finished room. They show the transformation journey. This creates an emotional arc that engages prospects and demonstrates the scope of your impact.
The Before-and-After Sequence
Your primary visual narrative should follow this sequence:
Initial State Photography (Unedited or minimally edited): Show the original condition of the space. If the before is unflattering—cramped, dated, cluttered—that's your advantage. The contrast amplifies your impact.
Mood Board or Inspiration Boards: 1–2 lifestyle or material boards showing the aesthetic direction and mood you're creating. This shows your vision-setting process.
Design Details: Close-up shots of key material choices, colour samples, and textural combinations. These build credibility—you're not just choosing things arbitrarily.
In-Progress or Process Shots: Optional, but powerful. If you have photos of installation, styling sessions, or construction work, include them. This humanises your process.
Finished Space Photography: Your hero shots. Multiple angles of the completed room, showing how the space functions and flows.
Lifestyle Imagery: If you can, photograph the space in use—with natural light at different times of day, or with styling that shows how clients will actually inhabit the room. An empty, perfectly styled room is beautiful; a room that feels liveable is more aspirational.
Photography Guidance for Squarespace Portfolios
The difference between mediocre portfolio photography and professional-grade portfolio photography is measurable: it directly affects inquiry conversion.
Camera Settings and Technical Requirements:
Camera Type: Use either a full-frame DSLR or a high-end mirrorless camera. Smartphone photography is acceptable for process/lifestyle shots but insufficient for hero photography.
Lens Selection: 24–35mm wide-angle lenses are standard for interior space photography. Avoid excessive distortion (anything wider than 20mm often warps perspective).
Aperture: f/4–f/8 provides adequate depth of field so the entire room is sharp and in focus.
ISO and Shutter Speed: For natural-light interiors, shoot 100–400 ISO with shutter speeds between 1/30–1/125, depending on available light.
White Balance: Set a custom white balance to match the colour temperature of the space's lighting (typically 2700K–3200K for warm interior lighting).
Composition and Staging:
Clear Sightlines: Remove obstacles from doorways and sight lines. Arrange furniture to show the room's proportions and flow.
Lighting Consistency: Shoot during the time of day when the space receives the most flattering natural light. For south-facing London homes, late afternoon often works best.
Styling Layers: Include styled surfaces (styled shelving, table settings, accessories) but avoid looking overly staged. The space should feel inhabited, not like a showroom.
Negative Space: Use white walls and open areas to allow the eye to rest. Overcrowded frames look cluttered.
Editing and Colour Grading:
Exposure Correction: Adjust exposure so the space feels bright and welcoming, but avoid blown-out highlights.
Colour Temperature: Keep warm, inviting tones rather than cool or clinical colour casts. This subconsciously conveys comfort.
Contrast and Clarity: Moderate contrast (not heavy) maintains dimension without looking over-processed.
Consistency Across Projects: Develop a house style for how you edit all your project photography. Consistent colour grading across your portfolio strengthens brand recognition.
Squarespace-Specific Optimisation:
Upload images at minimum 1500px wide for portfolio blocks
Use Squarespace's built-in image compression to maintain fast page load times (aim for < 3 second load on 4G)
Use Squarespace's carousel and lightbox features to present before-and-after comparisons
Enable alt text for all images (important for SEO and accessibility)
Mood Board Integration: Creating Immersive Design Narratives
Mood boards are underused in interior design portfolio presentations, yet they're incredibly powerful for communicating design thinking to prospects.
Why Mood Boards Matter for Portfolio Conversion
A mood board shows your aesthetic decision-making in a single visual. It communicates:
Colour palette and harmony
Textural approach (matte vs. shiny, rough vs. smooth)
Material combinations
Overall design mood (serene, energetic, eclectic, etc.)
When a prospect sees your mood board alongside your finished project, they understand how you think about design. They can visualise whether your aesthetic approach aligns with theirs.
Embedding Mood Boards on Squarespace Project Pages
Option 1: Native Squarespace Image Block Create your mood board as a 1600×1200px image file combining 6–8 material and colour samples, inspiration images, and reference photography. Upload it as a single image block in your project page. Simple, clean, and loads quickly.
Option 2: Pinterest Integration If you maintain a project-specific Pinterest board, embed it on your Squarespace page using the Pinterest block or an embedded link. This allows prospects to explore your inspiration sources and creates ongoing content without requiring you to update the page.
Option 3: Carousel Gallery Create a 4–6 image carousel showing mood evolution: initial inspiration, material samples, colour selections, and final implemented aesthetic. This tells the story of your design refinement process.
Best Practice: Include 1–2 sentences explaining your mood board selections. Example: "For this project, we wanted to balance traditional Georgian architecture with contemporary comfort. This mood board informed our palette of soft greys, warm wood tones, and natural linen textures—creating a space that honours the building's period character whilst feeling distinctly modern."
Client Testimonials and Social Proof Placement Strategy
Client testimonials are your most credible form of social proof. Yet many interior designers relegates them to a separate testimonials page. This is a missed opportunity.
The strategic placement principle: Testimonials should live alongside the project they reference, not separated from it.
Testimonial Placement Tactics for Squarespace
Inline with Project Pages: Rather than a generic quote, match each testimonial to its corresponding project. Position the quote immediately after the finished project photographs or at the bottom of the project narrative:
"We hired [Designer Name] to transform our 1970s kitchen. We were nervous about the cost and whether the design would actually match our lifestyle. From the initial mood board presentation, we felt completely understood. The finished kitchen exceeds everything we imagined. We use it constantly, and every detail—from the storage solutions to the lighting—works perfectly. We can't recommend [Designer Name] highly enough." – James and Catherine H., Notting Hill
Include Specific Details: Generic testimonials ("Great designer, highly recommended!") are less persuasive than specific ones. The best testimonials mention:
The specific space or problem solved
How the designer understood their needs
The tangible result or outcome
The experience of working together
Use Client Photos (With Permission): If you have a photo of the client in their finished space, even better. A face and name attached to a testimonial is far more credible than an anonymous quote.
Star Ratings or Trust Badges: Consider adding a simple 5-star rating next to client testimonials. Squarespace supports review blocks that display ratings visually.
Frequency and Rotation: If you have multiple testimonials for the same project, rotate them. This prevents the page from looking stale if a prospect visits multiple times.
Project Gallery Organisation and Navigation Best Practices
How you organise your complete portfolio affects how prospects navigate your work and whether they find projects they relate to.
Categorisation Strategy
Rather than listing projects chronologically, organise by room type and project scope:
By Room Type:
Living Rooms & Lounges
Kitchens & Dining Spaces
Bedrooms
Home Offices
Bathrooms
By Project Scale:
Full Home Renovations
Single-Room Refreshes
Commercial / Hospitality Projects
By Design Aesthetic:
Contemporary Minimalism
Traditional & Period
Eclectic & Maximalist
Sustainable & Eco-Conscious
This approach serves two audiences: prospects browsing to see if you work with their room type, and those who've already decided they like your style and want to explore more work.
Navigation Structure on Squarespace
Use Squarespace's collection pages and filtering to allow prospects to view projects by category. A clean navigation menu should include:
All Projects (complete portfolio)
Room Type filters (optional drop-down)
Case Studies (your most comprehensive, detailed projects)
The key is reducing friction. A prospect should be able to find projects relevant to their needs in 1–2 clicks.
Project Titles That Convert
Avoid generic titles like "Living Room" or "Interior Design Project 2025." Instead, use titles that communicate scope and style:
"Contemporary London Townhouse: Creating a Connected Family Home"
"Period Bedroom Refresh: Blending Heritage with Modern Comfort"
"Open-Plan Kitchen Renovation: Transforming a Dark 1980s Space"
These titles contain keywords your prospects are searching for (room type, design style, transformation type) and immediately communicate what the project entails.
Frequently Asked Questions
-
Structure each project page using the BRIEF-AFTER Framework: start with the client's challenge and design brief, show your research and inspiration process, present your design solutions, then showcase the before-and-after transformation and client outcome. Include specific details about design choices (colour selections, material reasoning, spatial planning) and explain why you made those decisions. This demonstrates design thinking rather than simply taste. Keep descriptions concise—1–2 paragraphs maximum—and let photography carry the visual narrative. End with a client testimonial that speaks to the experience of working with you.
-
Absolutely. Testimonials placed directly beneath or alongside project photography are far more persuasive than isolated testimonials on a separate page. The proximity between the finished space and a client's positive experience creates a cognitive connection: This space looks beautiful AND the client had a great experience. Specific, detailed testimonials that mention the design challenge, the designer's approach, and the tangible outcome are most convincing. Include the client's name and location (e.g., "Sarah M., Fulham") to add credibility.
-
A comprehensive project should include 8–15 images: 1 before photo, 1–2 mood boards, 2–3 detail shots of materials and colours, 4–6 finished space photographs (showing different angles and times of day), and 1–2 lifestyle images showing the space in use. This provides enough visual storytelling to demonstrate your design approach without overwhelming the viewer. If space is limited, prioritise before-and-after contrasts and finished photography over in-progress shots.
-
Squarespace's carousel feature works well for before-and-after sequences—alternating before and finished photos in a gallery that viewers swipe or click through. Alternatively, use a side-by-side image comparison block (available through third-party Squarespace apps like Afterwire or Pixeler) to show before and after simultaneously. For maximum impact, ensure the before photo is taken from the exact same angle and distance as the after photo, so the transformation is immediately apparent.
-
Use a full-frame DSLR or mirrorless camera with a 24–35mm lens. Set aperture to f/4–f/8 for sharp focus across the entire room. Shoot during the best natural light hours (typically mid-afternoon for south-facing rooms). Ensure white balance matches your space's colour temperature (2700K–3200K for warm interiors). In post-processing, maintain consistent colour grading across all projects to strengthen visual brand recognition. Compose shots with clear sight lines, balanced negative space, and styled surfaces that feel inhabited rather than overly curated.
-
Embed a mood board on each project page showing the aesthetic direction, colour palette, material samples, and inspiration imagery you used. Include 1–2 sentences explaining your selections. This demonstrates your design thinking and allows prospects to evaluate whether your aesthetic approach aligns with their preferences. Prospects who connect with your mood boards understand your design language and are more likely to become clients because they've already visualised themselves working with you.
Conclusion
Your Squarespace portfolio is not a passive digital brochure. It's an active business development tool—the primary mechanism through which prospects decide whether to hire you. When you structure your projects using the BRIEF-AFTER Framework, invest in professional photography, integrate mood boards, and pair projects with genuine client testimonials, something shifts. Your portfolio stops being a collection of beautiful spaces and becomes a compelling case study in your design thinking, execution capability, and understanding of clients' needs.
Interior designers who treat portfolio presentation as a strategic priority—not an afterthought—see measurably higher inquiry conversion rates and attract clients who've already decided they want to work with them based on aesthetic alignment. Your next dream client is browsing your Squarespace site right now. The question is whether your project showcase convinces them you're the only designer for the job.
Start with your strongest 3–5 projects. Restructure them using the BRIEF-AFTER Framework. Invest in professional before-and-after photography. Add mood boards and client testimonials. Then watch how your inquiry quality improves.
Get Your Free Squarespace Consultation
Ready to transform your interior design portfolio into a client-conversion machine? Squareko specialises in designing and optimising Squarespace websites for interior designers and home service professionals.
Explore Squareko's Interior Design Services – Get a free consultation to discuss how to structure your portfolio for maximum impact.
Need guidance on Squarespace portfolio templates, SEO strategy, or project showcase best practices? Our interior design specialists are ready to help you build the website your clients are searching for.
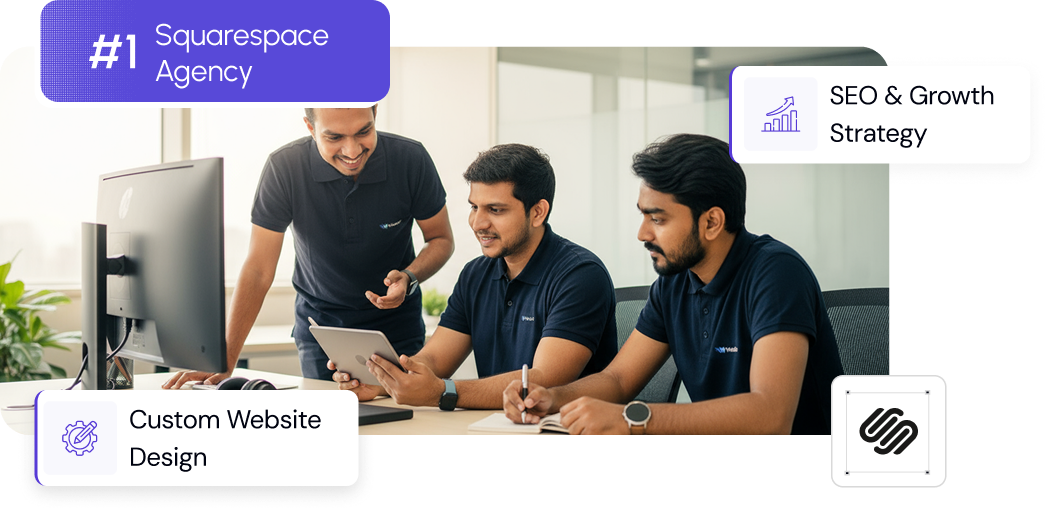
From custom website design to SEO strategy, we help businesses launch a site that looks professional and performs better.

About the Author
I'm Walid Hasan, a Certified Squarespace Expert and Squarespace Circle Platinum Partner with over 12 years of hands-on experience designing and optimizing high-performing websites. Over the years, I've had the privilege of building more than 2,000 Squarespace websites for clients around the world, always focusing on clean design, strong user experience, and conversion-driven results.